

Exterior basement waterproofing is the definitive way to stop water before it ever reaches your foundation walls. It’s the most comprehensive solution because it tackles the problem at its source. The process involves excavating the soil around your foundation, applying a heavy-duty waterproof barrier directly to the exterior walls, and creating a permanent shield that protects your home from leaks and long-term structural damage.
Understanding Why Your GTA Basement Leaks
Before you can fix a wet basement for good, you must understand why it’s happening. Many homeowners make the mistake of just cleaning up the puddle on the floor. That’s treating the symptom, not the cause, and the real problem almost always starts outside your home.
Imagine the soil around your foundation is a giant sponge. When we get a heavy downpour or a major spring thaw here in the Greater Toronto Area, that sponge becomes completely saturated. All that waterlogged soil creates immense force called hydrostatic pressure. This pressure is constantly pushing against your foundation, searching for any tiny crack or weak spot to force its way into your basement.
The Role of GTA Soil and External Forces
Here in the GTA, our soil often makes the problem worse. We have a lot of heavy clay, which is known for being expansive—it swells significantly when wet and shrinks dramatically when it dries. This constant cycle of expanding and contracting puts immense stress on your foundation year after year, eventually causing cracks that act like open doors for water.
This isn't just a local issue. Homes in other regions deal with similar challenges where expansive soil puts constant strain on foundations. There, just like here, exterior waterproofing is a must-have to seal cracks and stabilize the structure against that movement.
Back home, that external pressure is the number one enemy of a dry basement. A proper exterior basement waterproofing system is designed specifically to relieve this pressure and block water on the outside—something an interior system simply cannot do.
Common Culprits Beyond Soil Pressure
While hydrostatic pressure is the main villain, a few other issues often conspire to flood your basement:
- Faulty Weeping Tiles: Your weeping tile, or footing drain, is a perforated pipe running along the base of your foundation. Its job is to collect water and safely channel it away. Over time, these pipes can get clogged with silt, collapse under the weight of the soil, or may have been installed improperly from the start. Once that happens, they are useless.
- Improper Grading: The ground around your house must slope away from your foundation walls. If it slopes inward, you’re funneling every drop of rainwater and snowmelt directly toward your basement.
- Poorly Placed Downspouts: When your downspouts dump water right beside the foundation, they create a super-saturated zone of soil. It's like aiming a firehose at one spot on your basement wall every time it rains.
A wet basement is rarely caused by just one thing. It's usually a perfect storm of aging materials, intense soil pressure, and poor water management. Fixing only one part is just a temporary patch, not a real solution.
When you understand these root causes, it becomes clear why a full exterior waterproofing job is the most effective approach. It’s about being proactive and stopping water outside, rather than just dealing with the mess after it’s already gotten in. While an exterior system is your first line of defense, maintaining healthy indoor humidity is also key, which is where effective basement dehumidification comes in. Together, they create a complete system to keep your basement dry.
The Exterior Waterproofing Process Step-by-Step
A proper exterior waterproofing job isn't a quick fix; it's a major construction project that gets to the source of your wet basement problems. Think of it as creating a multi-layered, impenetrable fortress around your foundation. For homeowners in the GTA, knowing what a real professional job looks like helps you spot the difference between a long-term solution and a temporary patch-up.
When a reputable crew arrives, they know they’re dealing with the structural integrity of your home. It’s serious work. Here’s a breakdown of exactly what you should expect to see, from the first shovel in the ground to the final cleanup.
Stage 1: Excavation and Foundation Exposure
First, the excavation. This is the most disruptive part of the project. A crew will use machinery—or in the tight spaces common to many Toronto homes, good old-fashioned hand-digging—to carefully excavate a trench around your foundation.
This trench must go all the way down to the footings, which are the concrete base your foundation walls sit on. This is non-negotiable. Exposing the entire wall is the only way to get a clear view of the problem and apply the new waterproofing system correctly. A contractor who doesn't dig deep enough is setting you up for failure, because water will always find the weak spot below their partial repair.
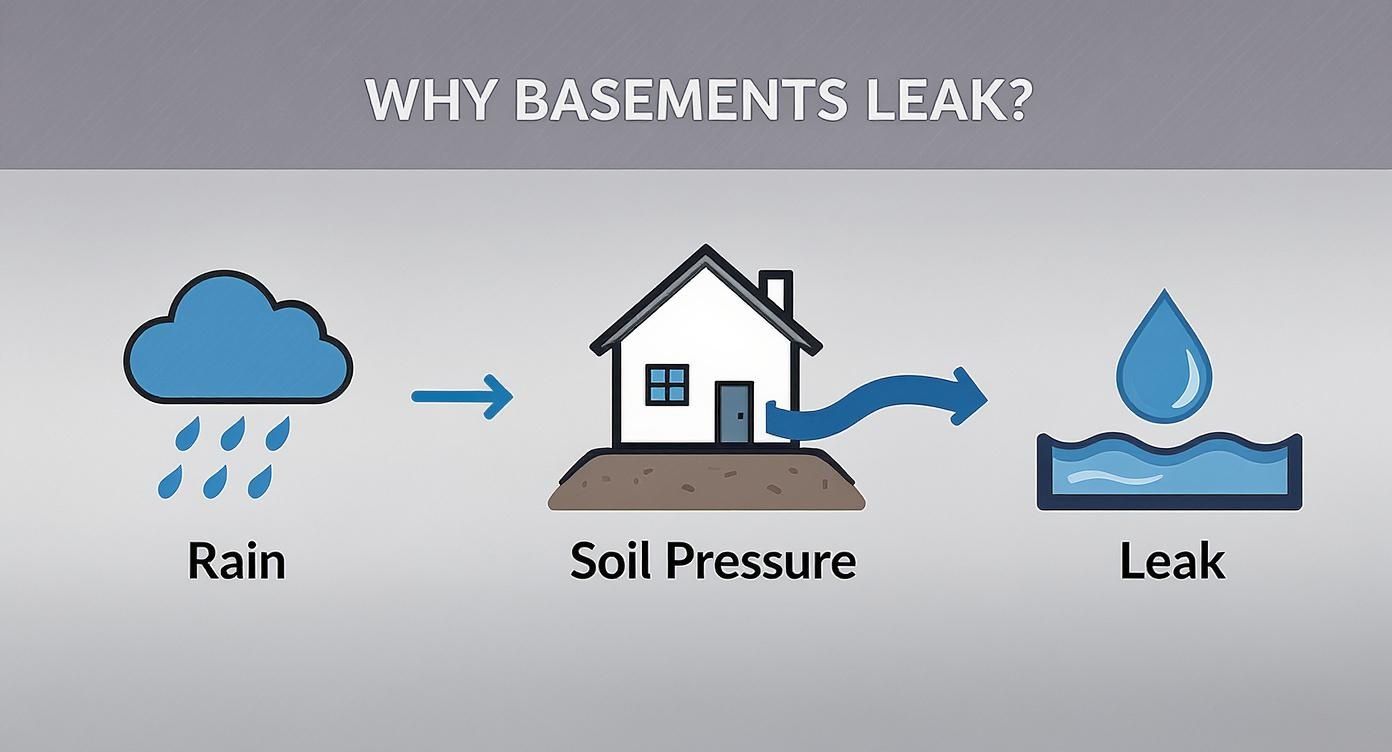
As this infographic shows, when the soil gets saturated, it puts immense pressure on your foundation. Without an exterior barrier, moisture is pushed directly into any crack or flaw it can find.
Stage 2: Wall Preparation and Crack Repair
Once the foundation walls are exposed, they get a thorough cleaning. This isn't just a quick rinse; it’s a powerful pressure wash to remove years of dirt, caked-on mud, and any old, failing sealant. You need a perfectly clean, bare surface for the new waterproof membrane to bond properly.
With the wall clean, the diagnostic work begins. The crew will inspect every square inch, identifying every crack, hole, and seam. These weak points are then meticulously repaired, typically with hydraulic cement or epoxy injections that create a permanent, watertight seal. Simply slathering a new coating over an existing crack won't work—the crack must be filled to restore the wall's integrity before any waterproofing layers are applied.
A waterproof membrane is only as good as the surface it's applied to. Skipping the detailed cleaning and crack repair phase is like painting over rust—the problem will quickly reappear.
Stage 3: Applying the Waterproofing Layers
This is the heart of the exterior basement waterproofing solution. A professional job involves applying several layers of robust protection.
Primary Waterproof Membrane: The first layer is a thick, seamless coat of a rubberized sealant. Think of it as a flexible, tar-like liquid that, once cured, forms a durable, waterproof shield. It’s designed to bridge small cracks and move with the foundation as it settles, preventing new leaks from forming.
Secondary Dimple Board: Next, a dimple board is installed over the membrane. This is a tough plastic sheet covered in raised "dimples" that creates a small air gap between the soil and your newly waterproofed wall. It plays two critical roles: protecting the membrane from rocks and damage during backfilling, and creating a clear channel for any water to flow straight down to the drainage system.
Stage 4: New Drainage and Backfilling
With the walls sealed and shielded, the final piece of the puzzle is managing the water that collects at the base of the foundation. This is where a new weeping tile system comes in. A perforated pipe is laid in a bed of clean gravel at the footing level and is wrapped in a filter cloth to keep out silt and dirt.
Its only job is to collect water and carry it safely away from your foundation, usually to a sump pump inside or to the city's storm sewer. You can learn more about the importance of a properly installed weeping tile in our detailed guide.
Finally, the trench is carefully backfilled. This is done in stages, starting with clean gravel against the dimple board to promote drainage, followed by the original soil. The job is finished by grading the ground so it slopes away from your house, giving you one last line of defence against surface water.
What Goes Into a Modern Waterproofing System?
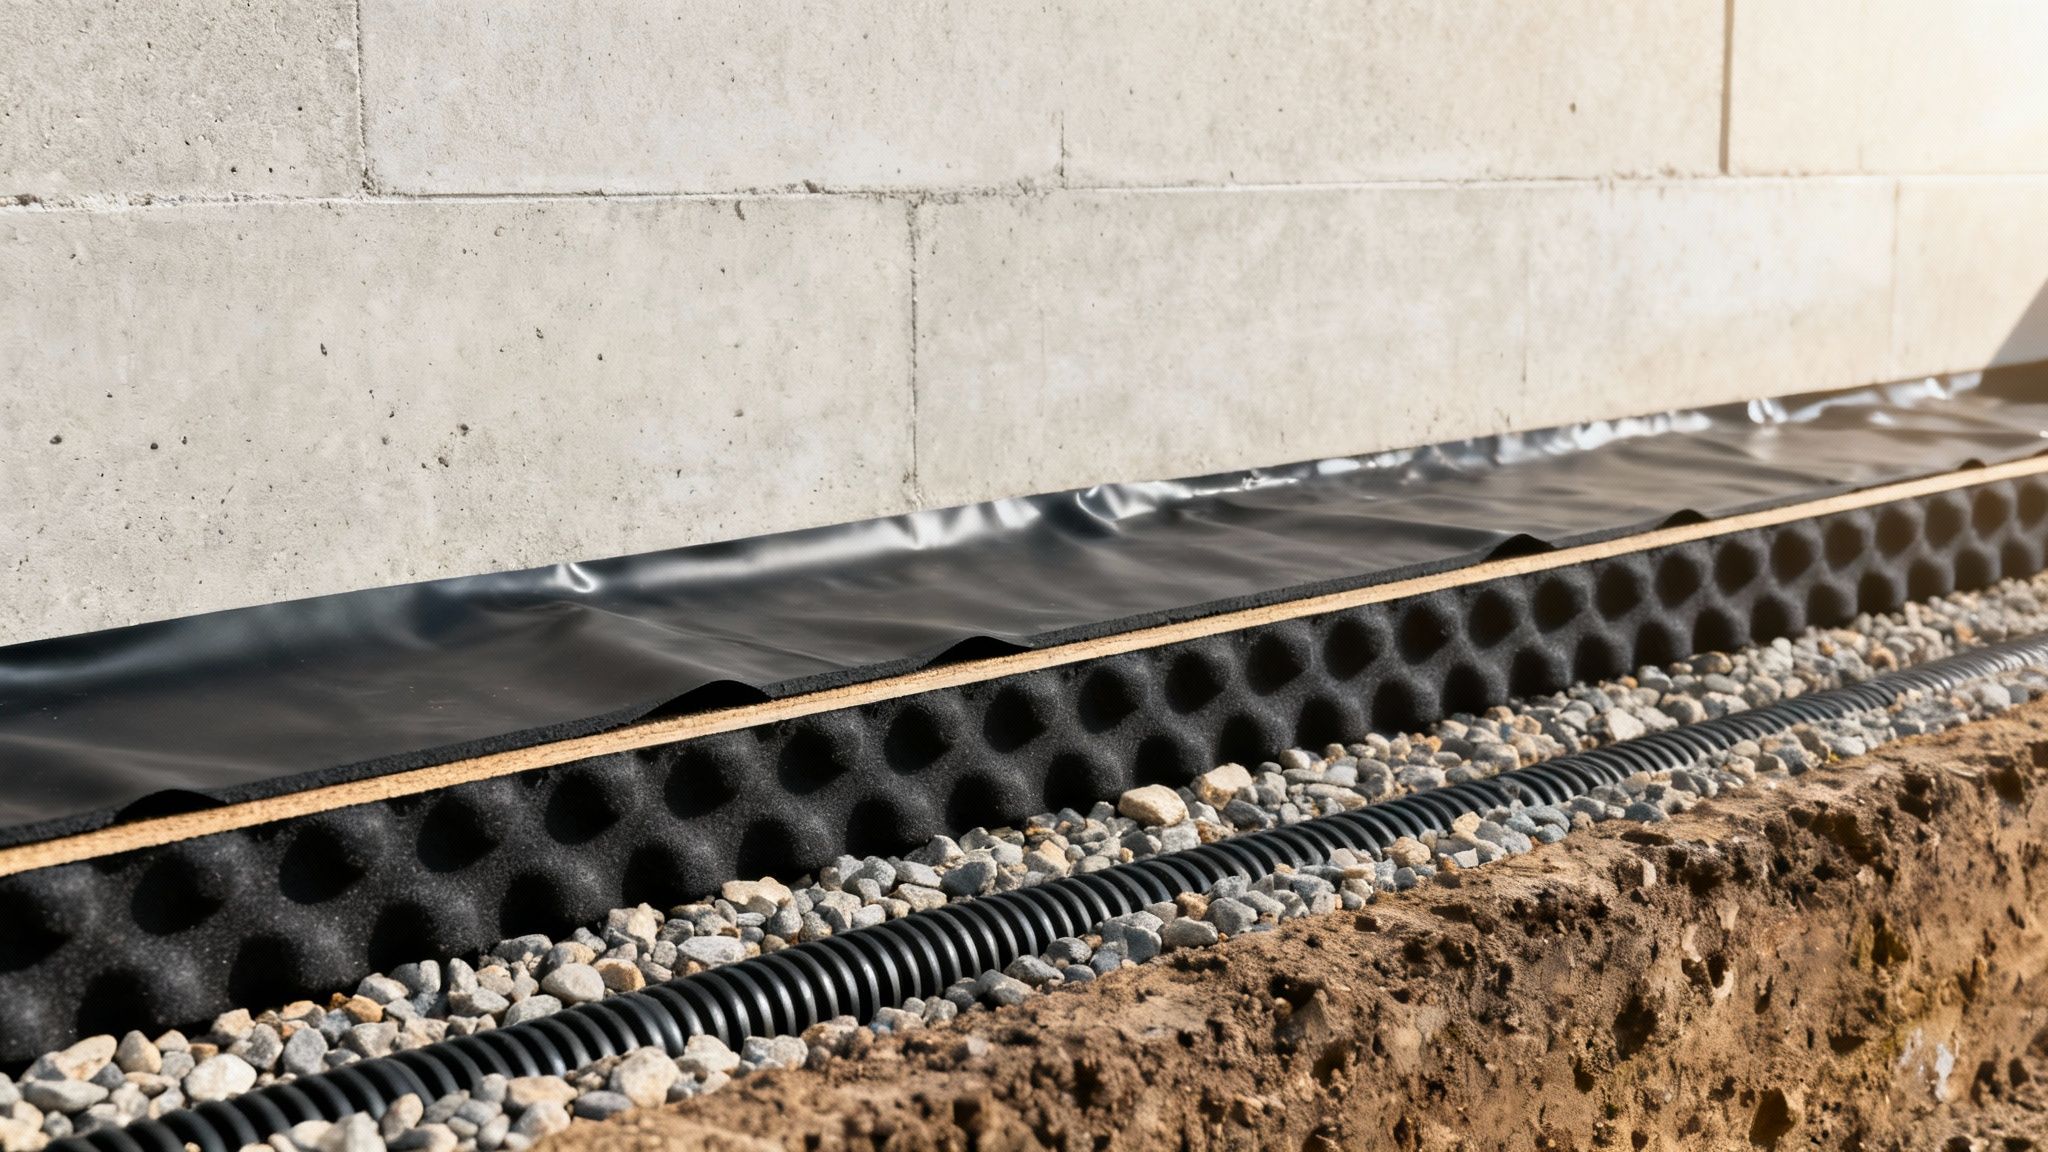
A proper exterior waterproofing job is much more than painting black tar on a wall and hoping for the best. A modern, reliable system is a team of specialized materials working together. Each component has a critical role, and when installed correctly, they create a multi-layered shield that will defend your home for decades.
Knowing what these parts are will help you ask contractors the right questions. It’s how you can tell the difference between a crew using high-quality, modern techniques and one that might be taking shortcuts.
The Primary Waterproof Membrane
The first line of defense, applied directly to your foundation, is the primary waterproof membrane. This is the main raincoat for your basement walls. Once the foundation is cleaned and all cracks are repaired, this seamless barrier is applied to stop water dead in its tracks.
You will generally see two main types:
- Liquid-Applied Membranes: These are typically rubberized, tar-like liquids sprayed or rolled onto the wall. When they cure, they form a thick, flexible, and completely seamless layer that bonds right to the concrete. Their main advantage is flexibility—they can stretch and move as the foundation settles or shifts with the seasons.
- Sheet Membranes: These are peel-and-stick sheets of rubberized asphalt. They offer a guaranteed, consistent thickness across the entire wall and are incredibly tough. That puncture resistance is a huge benefit when it’s time to backfill the trench with soil and rocks.
The best choice depends on your foundation’s condition and your contractor’s preference. Honestly, both are excellent options when installed by a professional. If you want to dive deeper into the materials, check out our guide on the best foundation waterproof membrane choices.
The Protective Dimple Board
After the primary membrane is on, the next layer is the dimple board. This is a tough, semi-rigid plastic sheet covered in small bumps or "dimples," and it’s a non-negotiable part of any legitimate waterproofing project today.
The dimple board does two things the membrane can’t do on its own:
- Physical Protection: It acts like armor, shielding the waterproof membrane from sharp rocks, roots, or debris in the soil during backfilling. This is crucial for keeping the primary barrier from being punctured.
- Drainage and Pressure Relief: The dimples create a small air gap between your foundation and the soil. This tiny space is a game-changer. It gives water a path of least resistance, allowing it to flow harmlessly down to the drainage system below instead of pushing against your basement wall.
Think of it this way: The dimple board creates a hollow drainage channel. Without it, water-logged soil would press directly against the membrane, constantly searching for any tiny imperfection.
The Weeping Tile Drainage System
Finally, you need a way to get rid of all the water that the dimple board guides to the bottom of the wall. That’s the job of the weeping tile, sometimes called a footing drain.
A brand-new, perforated pipe is laid in a bed of clean gravel at the base of your foundation, alongside the footing. The pipe is wrapped in a filter fabric to keep silt and mud out, ensuring it doesn't get clogged over the years.
This pipe system collects all the water and uses gravity to channel it away from your home. In most modern setups, the weeping tile directs water to a sump pump inside your basement. The pump then actively pushes the water out and far away from your property, making sure the ground around your foundation stays dry for good.
How Much Does Exterior Waterproofing Cost in the GTA?
This is the big question every homeowner asks, and for good reason. Exterior basement waterproofing is a major investment in your home’s health and value. But giving a single, flat-rate answer is impossible because every property in the GTA is different. The final cost comes down to the specific challenges your home presents.
The first thing to understand is that professionals price this job by the linear foot, not by the square footage of your basement. Why? Because the real work—and the cost—is in the digging. It's all about the length and depth of the trench we need to excavate around your foundation.
Key Factors That Influence Your Final Quote
Several factors can move the price up or down. Any reputable contractor should walk you through these variables so you know exactly where your money is going.
Here’s what we look at when building a quote:
- Required Digging Depth: A shallow foundation is easier and faster to access. The deeper we must dig to expose your footings, the more labour, time, and safety precautions are involved, which increases the cost per linear foot.
- Site Accessibility: Is your house wide open with plenty of room for an excavator? Or are you in a tight Toronto semi with just a narrow walkway? Limited access often means digging the entire trench by hand, which is a much slower and more labour-intensive job.
- Extent of Foundation Repairs: Once we expose the foundation, we might find more than just moisture. Significant cracks, crumbling sections, or honeycomb-like voids in the concrete must be properly repaired before any waterproofing membrane can be applied. The cost for these structural fixes is added to the base price.
- Quality of Materials: The specific waterproofing membrane, dimple board, and weeping tile we use will affect the cost. You can always find cheaper materials, but investing in top-tier products from the start ensures the fix will last for decades.
Understanding the Full Scope of Costs
Beyond the main tasks of digging, sealing, and backfilling, a few other things can factor into the final bill. It's good to have these on your radar so you can budget properly and avoid any surprises.
The goal of a quote isn't just to give you a number; it's to provide a clear, honest breakdown of the work required to permanently solve your water problem. A lowball offer often means crucial steps are being skipped.
You can get a more detailed look at what to expect in our comprehensive guide to Toronto basement waterproofing costs. This will help you see how all these factors come together in a real-world estimate.
Additional Potential Expenses
Don't forget to account for these related costs. Depending on the contractor, they may or may not be included in the initial quote, so it’s always best to ask.
- Landscaping Restoration: Let's be honest, excavation is messy. The cost to put back your garden, re-sod the lawn, or rebuild a patio is often a separate line item.
- City Permits: Your municipality may require a permit for the work, depending on the job's scope and where you live.
- New Window Wells: If your old window wells are rusted or damaged, replacing them while the foundation is exposed is the smartest and most cost-effective time to do it.
Of course, pricing varies by region due to different labour and material costs. For instance, waterproofing a basement in Los Angeles can run from $7,000 to over $13,600 for bigger projects, as the work is similarly intensive. You can explore regional pricing data on Angi.com to see how costs differ elsewhere. While the exact numbers change, the core principle is the same: you’re paying for a permanent solution to protect your home.
Choosing the Right Waterproofing Contractor in Toronto

This is the single most important decision you'll make in the entire waterproofing process. Getting it right means protecting your home's value for decades. A bad job, on the other hand, can create a bigger, more expensive nightmare than the one you started with.
Finding a true expert in the GTA isn't just about getting a few quotes; it's about doing your homework. When you're making this kind of investment, you need a partner who will do the work right—no shortcuts, no excuses.
The Non-Negotiable Checklist
Before you sign a contract, make sure any contractor you're considering ticks these essential boxes. Think of this as the bare minimum for anyone you’d let near your home's foundation.
- Proper Licensing and Insurance: Your contractor must hold a valid municipal license for Toronto or your city. Just as critical, they need substantial liability insurance. This protects you if anything goes wrong and your property is damaged.
- WSIB Coverage: Always confirm the company has active Workplace Safety and Insurance Board (WSIB) coverage for every worker. If someone gets hurt on your property and there's no coverage, you could be held liable.
- Local, Verifiable References: Ask for a list of recent projects they've completed in your area. A contractor who is proud of their work will have no problem letting you speak with past clients.
Digging Deeper Than the Quote
Once you've sorted out the essentials, it's time to get a feel for the quality of the company itself. The principles for vetting a waterproofing pro are similar to learning how to choose a reliable contractor for any major home renovation.
Focus on these key areas when comparing your options:
- Experience with GTA Homes: Toronto's housing stock is a unique mix of old foundations and tight property lines. You want a team with hands-on, specific experience tackling the real-world challenges of exterior basement waterproofing in this city.
- A Clear, Detailed Scope of Work: A quote should be more than a final price. It needs to be a detailed roadmap that outlines every step: how deep they'll excavate, how they'll repair cracks, the specific brand of membrane they'll use, and the plan for backfilling and cleanup.
- A Solid, Transferable Warranty: A warranty is a company’s promise. You need to know exactly what it covers, how long it lasts, and if it can be passed on to the next homeowner. A long-term, transferable warranty is a sign of confidence and adds genuine value to your property.
A contractor who is vague about their process, materials, or warranty is a major red flag. True professionals are transparent because they have nothing to hide.
Red Flags to Watch Out For
Knowing what to look for is only half the battle; you also need to know what to run from. Be cautious of any company that shows these warning signs:
- High-Pressure Sales Tactics: You should never feel rushed into signing on the spot. A professional will give you the space and time you need to review their proposal and ask all your questions.
- Suspiciously Low Bids: If one quote is drastically lower than the others, there's a reason. It almost always means corners are being cut, whether with unskilled labour, cheap materials, or by skipping a crucial step like installing a proper drainage system.
- Requesting Large Cash Deposits: A reasonable deposit is normal business practice. A demand for a huge cash payment upfront, however, is a classic warning sign.
Taking your time to vet a contractor properly is the best way to ensure your investment is safe and your home stays dry for the long haul.
Got Questions About Exterior Waterproofing? You're Not Alone.
Taking on a project like exterior basement waterproofing is a big decision, and it’s completely normal to have questions. It's a serious investment in your home's long-term health, so you want to get it right. We've been doing this for decades in the GTA and have heard just about every question in the book. Here are some of the most common ones we get from homeowners.
How Long Is My Yard Going to Be a Construction Zone?
The honest answer? It depends. For a smaller, straightforward job where we can easily get our equipment in, we can often be in and out in about 5 to 7 days.
But things can get more complicated. If you've got a larger home or live in a neighbourhood with tight lots, we might have to dig everything by hand. That takes time and serious elbow grease, pushing the timeline closer to 10 to 14 days, sometimes longer. And of course, we’re at the mercy of the weather. A few days of heavy rain can halt excavation and prevent the membrane from curing, adding to the schedule. A good contractor will walk your property, give you a realistic timeline upfront, and keep you in the loop.
Are You Going to Destroy My Garden?
Let's be upfront: some disruption to your landscaping is unavoidable. To do this job right, we must dig a wide trench down to the footings of your foundation. Anything planted right up against the house—your prize-winning roses, the walkway you just installed—will need to be moved.
A professional crew, however, knows the difference between excavation and demolition. Our goal is to minimize the chaos as much as possible.
- We’ll carefully dig up and set aside plants and shrubs so they can be replanted.
- We lay down tarps and plywood to protect the surrounding lawn and patios.
- Once the work is done and we backfill the trench, we'll re-grade the soil properly to ensure water drains away from your house, leaving you with a clean slate for your landscaping.
The key is communication. Talk to your contractor beforehand about the plan for protecting and restoring your yard so there are no surprises.
Do We Need to Pack a Suitcase and Move Out?
For the vast majority of exterior waterproofing jobs, you absolutely do not need to move out of your home. All the action happens outside, so you can go about your daily life without much interruption.
That said, it won't be silent. You should expect a fair bit of noise and vibration, especially when the digging starts and when we're filling the trench back in. If you work from home or have young children who need to nap, you might want to plan an outing during the noisiest parts of the day. Our crew will need to use an outdoor water tap and electrical outlet, but we won't need to set foot inside your house unless we're also installing a sump pump.
Why Does Exterior Waterproofing Cost So Much More Than Interior?
This is a great question, and it comes down to what the two systems are actually doing. Exterior waterproofing is a truly preventative solution. It’s more labour-intensive because we're stopping the problem at its source—before water can even touch your foundation. This involves heavy machinery, digging deep trenches, meticulously cleaning and repairing the foundation walls, and applying a robust, multi-layered waterproofing system.
Interior systems, on the other hand, are designed to manage water after it has already seeped through your foundation. They're basically a water-diversion plan. While often cheaper upfront, they don't solve the core issue of water pressing against your home's structure.
Think of it this way: An interior system is like placing a bucket under a leaky roof. It keeps the floor dry, but the roof is still leaking. An exterior system is like hiring a roofer to replace the shingles and fix the leak for good. One manages the symptom; the other cures the disease.
The reality is, basement moisture is a massive problem. Studies suggest that over 60% of existing homes have issues with it, and ongoing leaks can slash a property's value by up to 25%. You can learn more about the impact of basement water damage and see why a permanent, exterior fix is almost always the smarter long-term investment.
Protecting your home’s foundation is one of the most important investments you can make. If you’re dealing with a wet basement or want to safeguard your property for the future, the team at G1000 Home Substructure is here to help. With over 25 years of experience in the GTA, we provide expert exterior waterproofing solutions built to last. Contact us today for a free, no-obligation consultation.

