

When it comes to a professional sump pump installation in the Toronto area, you can expect the cost to be somewhere between $1,200 and $4,500. This isn't a one-size-fits-all price, of course. The final quote depends entirely on whether you're just swapping out an old pump or putting in a brand-new system from scratch.
What Is the Real Cost of a Sump Pump in Toronto?
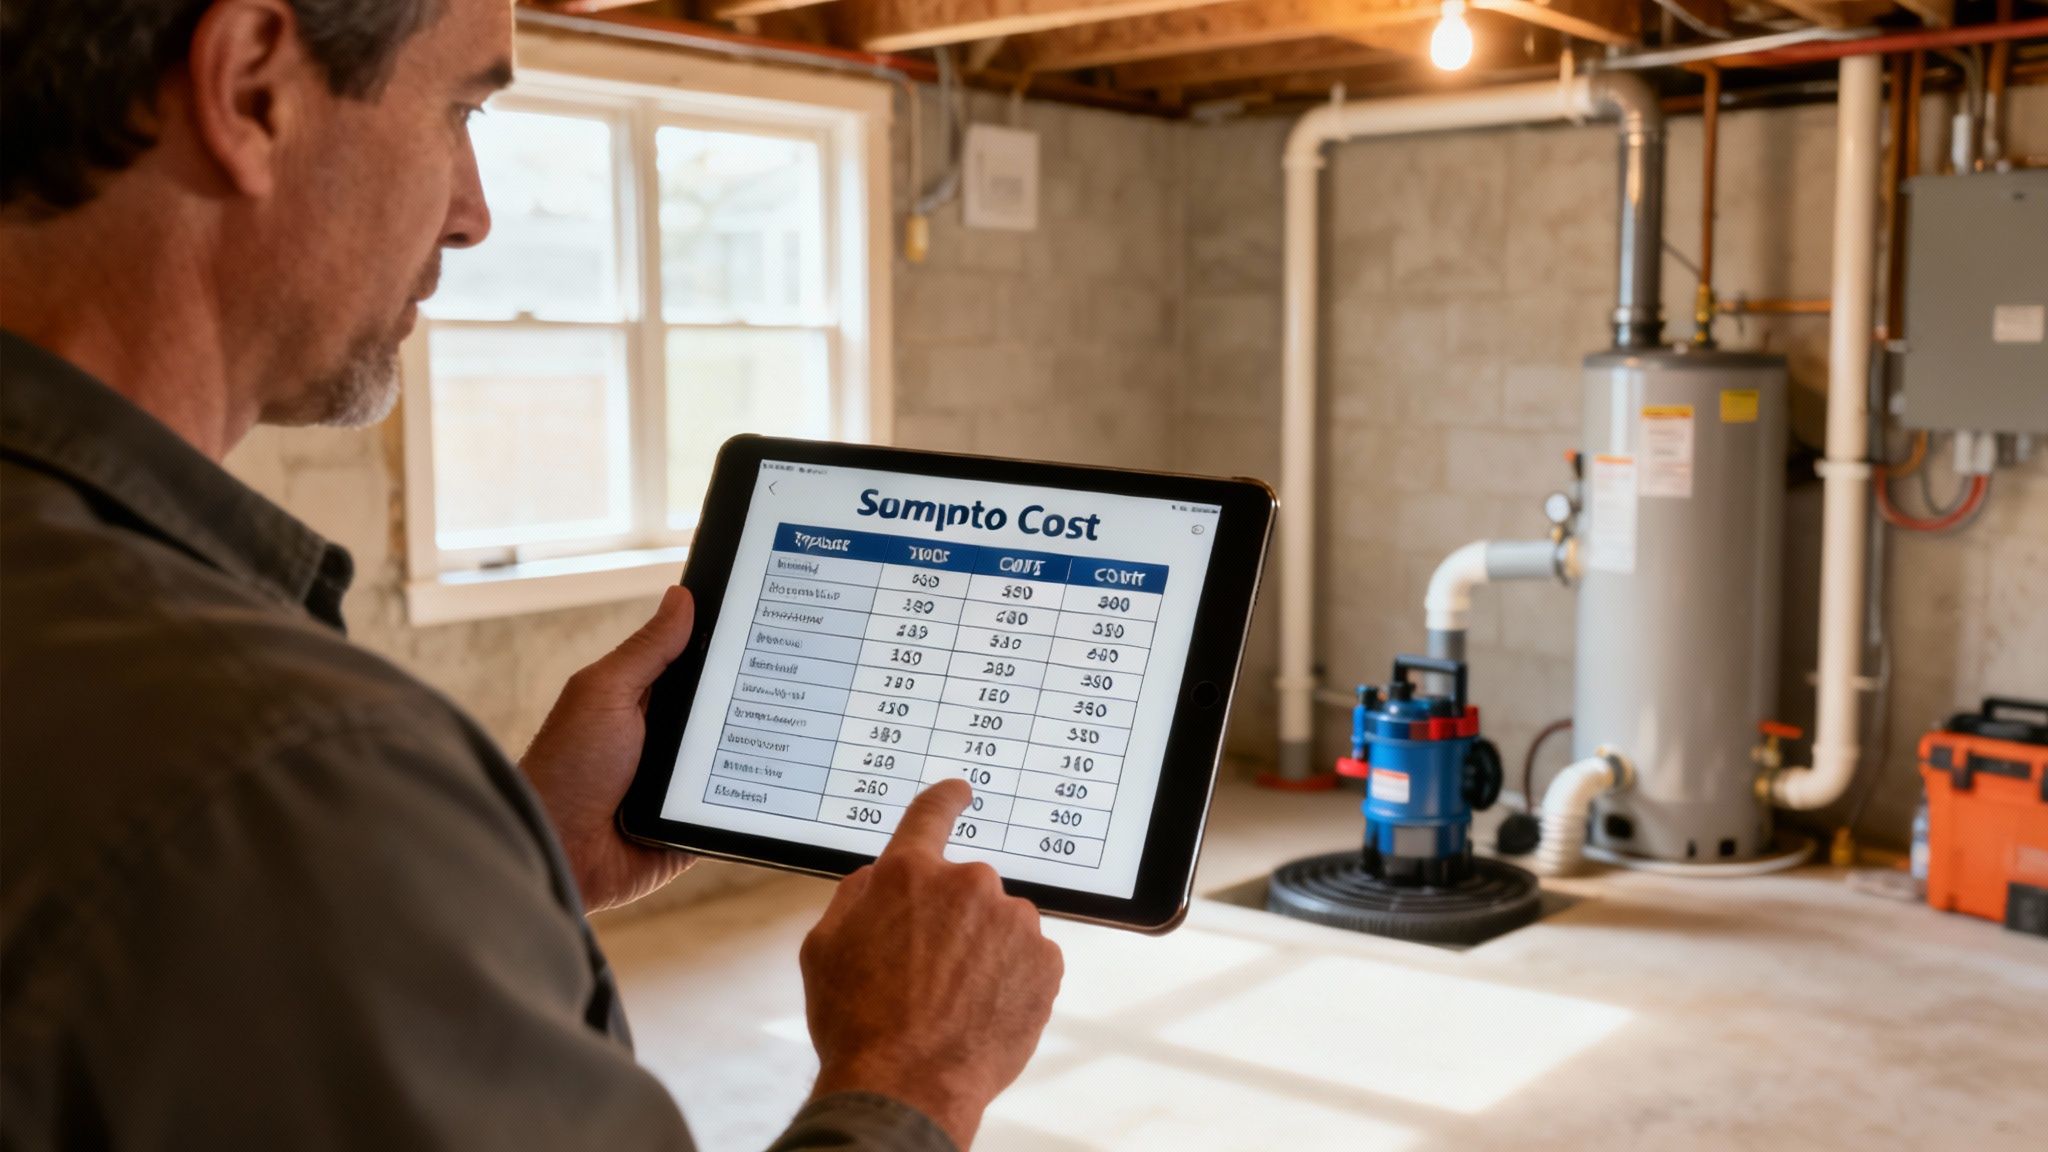
It's natural to see a wide price range and wonder what's really going on. The cost isn't just about the pump; it’s about the entire system and the expertise needed to install it right. Think of it less like buying an appliance off the shelf and more like making a critical investment in protecting your home’s foundation from water damage.
If you already have a sump pit and the plumbing is in good shape, a simple pump replacement will fall on the lower end of that scale. The heavy lifting is already done. A new installation, however, is a different story. It's a complex job that requires breaking concrete, digging a pit, and running new pipes—work that demands specialized tools and real-world experience.
Understanding the Cost Brackets
To give you a clearer idea of where your project might land, we've broken down the costs into different tiers. This should help you understand what to expect for your specific situation.
Sump Pump Installation Cost Tiers at a Glance
This table gives a quick summary of what you can expect to pay for different sump pump installation jobs right here in the Greater Toronto Area.
| Installation Type | Typical Cost Range (CAD) | What's Included |
|---|---|---|
| Basic Pump Replacement | $600 – $1,200 | This covers a new, standard-quality pump and the labour to swap out your old one. It assumes the existing pit and plumbing are in good condition. |
| Standard New Installation | $1,200 – $2,800 | This is the most common scenario for Toronto homes. A new sump pit is dug, a reliable mid-grade pump is installed, and the necessary discharge piping is run to the exterior. |
| Complex or Premium Installation | $2,800 – $4,500+ | This tier is for more involved jobs, like breaking through thick concrete, adding a battery backup system, or installing a high-end cast iron pump for maximum durability. |
Keep in mind these figures are based on local labour rates and material costs here in our region. Budgeting for home maintenance can be tricky, and it's helpful for understanding typical costs for professional home maintenance services in the Greater Toronto Area, even if they're for different parts of your house. The main takeaway is that professional work, whether for your furnace or your foundation, is an investment in your home's health and safety.
What’s Behind That Final Installation Price Tag?
Have you ever wondered why one sump pump installation quote is $1,500 while another is over $4,000, especially around the Toronto area? It’s not random pricing. The final cost comes down to the specific details of your home and the scope of the job. Understanding these factors is the best way to have a clear conversation with your contractor and avoid sticker shock.
The price you pay isn't just for the pump itself. It’s for the complete system: the equipment, the skilled labour, and the unique challenges your basement might present. Let's pull back the curtain on what really shapes that final number.
The Pump Itself: Your First Major Choice
The heart of the system is the pump, and like a car, you have options that directly affect the cost.
- Submersible vs. Pedestal: A submersible pump is the quiet, hidden workhorse. It sits inside the sump pit, out of sight and mind, making it perfect for finished basements. Pedestal pumps, on the other hand, have their motor sitting up high, out of the water. They're often cheaper and easier to service, but they're also more noticeable. For most homes in the GTA, submersible models are the go-to choice.
- Material Composition: Your pump will likely be either thermoplastic (a tough plastic) or cast iron. Thermoplastic gets the job done and is easier on the wallet. But if you’re looking for a long-term, heavy-duty solution, cast iron is the way to go. It’s better at handling heat and is built to last. Opting for a cast iron pump can add $200 to $500 to the bill, but it's a solid investment in durability.
Your Basement's Unique Challenges
This is where costs can really diverge. No two basements are the same, and each one presents a different puzzle for an installation crew.
If you're just swapping out an old pump in an existing pit, it's a relatively simple job. But if your home has never had a sump pump? That’s a completely different project.
For a brand-new installation, a technician has to physically break through your concrete floor, dig out a pit to the right size, and haul away the debris. This isn't a simple DIY task; it's skilled, heavy labour that requires the right tools and know-how.
Here’s what can make the job trickier—and more expensive:
- Thick Concrete: Breaking through a standard 4-inch basement floor is one thing. If you've got 6 inches or more of reinforced concrete, the crew needs more time and more powerful equipment.
- Power Source: Your sump pump needs its own dedicated GFCI (Ground Fault Circuit Interrupter) outlet. If there isn't one nearby, an electrician will need to run a new line, which is an added cost.
- The Discharge Route: The discharge pipe has to run from the pump to the outside, sloped correctly so water flows away from your foundation. A long or complicated route means more materials and more labour.
To give you a clearer picture, let's look at how these factors play out.
Cost Factor Breakdown for Sump Pump Installation
| Cost Factor | Low-Cost Scenario | High-Cost Scenario | Impact on Price |
|---|---|---|---|
| Project Type | Replacing an existing pump in a pre-dug pit. | A new installation requiring excavation. | High: New installs are significantly more labour-intensive. |
| Pump Type | Basic thermoplastic pedestal pump. | High-end, cast iron submersible pump. | Medium: A premium pump adds several hundred dollars. |
| Concrete Floor | Standard 3-4 inch non-reinforced concrete. | 6+ inch concrete floor with rebar reinforcement. | High: Requires more time, labour, and heavy-duty equipment. |
| Electrical | A dedicated GFCI outlet is already nearby. | An electrician must be hired to install a new circuit. | Medium: Can add a few hundred dollars to the total. |
| Plumbing | Simple, short discharge line to the exterior. | Long or complex pipe route requiring more materials. | Medium: Increases both material and labour costs. |
| Add-Ons | No additional systems are installed. | A battery backup system and high-water alarm are included. | High: A good backup system can add over $1,000. |
As you can see, a "simple" job can quickly become complex based on the existing conditions of your home.
Labour Rates and Local Expertise
A huge slice of your final bill is labour. Here in the Greater Toronto Area, hiring a licensed and insured waterproofing specialist costs more than a general handyman, and for good reason. This isn't a job you want to leave to chance; a small mistake can lead to a very big, very wet problem.
When you hire a pro, you're paying for their expertise to:
- Pinpoint the Right Location: They know how to find the lowest point in your basement where water will naturally collect first.
- Ensure Proper Setup: They'll make sure the pump, the check valve (which stops water from flowing back in), and the float switch are all installed perfectly for your system.
- Guarantee Code Compliance: They'll ensure the entire setup meets local Toronto and Ontario building codes for both plumbing and electrical work.
Don't Forget the Extras and the Paperwork
Lastly, a few other items can nudge your final price up. A battery backup system is arguably the most important add-on you can get. The big storms that cause basement flooding are often the same ones that knock out your power. A standard pump becomes useless right when you need it most. Adding a backup system can cost between $500 and $1,500, but that’s a small price for true peace of mind.
Also, depending on where you live in the GTA, you might need a plumbing or building permit. A professional contractor will handle the paperwork, but the city’s fees will be factored into your final quote. By keeping all these pieces in mind, you'll be able to read any quote with confidence and make a smart choice to protect your home.
Choosing the Right Sump Pump for Your Home
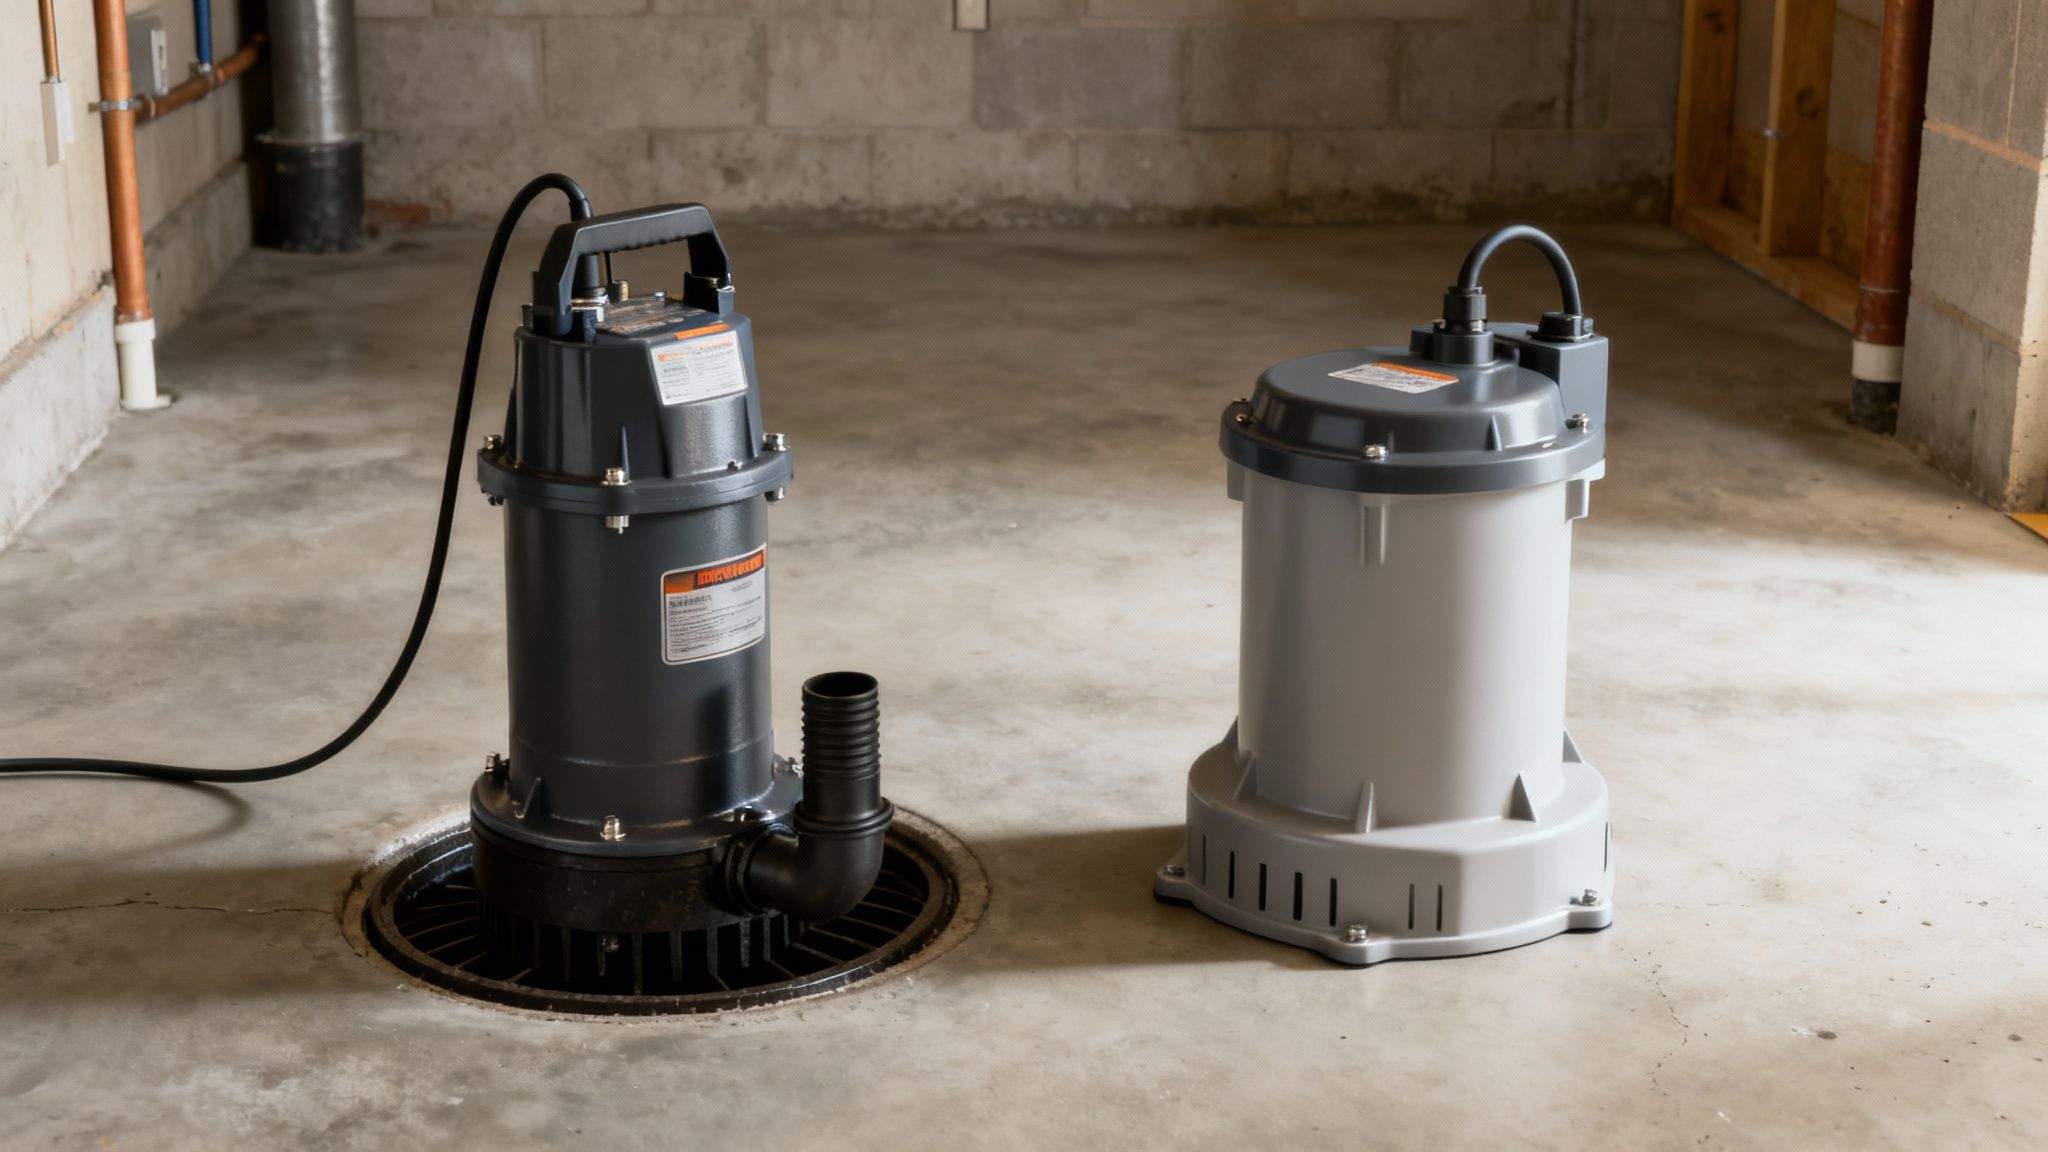
Picking the right sump pump isn't just about grabbing one off the shelf. It’s like buying winter tires before a Toronto snowstorm—you need something built for the job. This pump is the heart of your home's waterproofing system, and making a smart choice now is what will keep your basement dry when the rain really starts coming down.
The first major decision you'll face is choosing between the two main types of sump pumps. Each has its pros and cons, and the right one for you boils down to your basement's setup and your budget.
Submersible vs. Pedestal Pumps
For most modern homes, the go-to choice is a submersible pump. As the name implies, the entire unit sits down inside the sump pit, fully submerged in the water it’s designed to pump out. This design has two major advantages: it’s incredibly quiet, and it’s completely out of sight, a huge plus if you use your basement as a living space. On top of that, submersible pumps tend to be more powerful and are built to last.
On the other hand, you have the pedestal pump. With this design, the motor sits on a tall column, high and dry above the sump pit. This makes them easier to access for maintenance and they often come with a lower price tag. The trade-off? They're noticeably louder and take up floor space, making them less ideal for a finished rec room or basement suite.
For the majority of homeowners in the GTA, a submersible pump is the clear winner. The quiet operation and clean, hidden installation are well worth the investment.
Material Matters: Cast Iron or Thermoplastic
Once you've settled on the type, the next thing to look at is what the pump is made of. This decision directly impacts how long the pump will last.
- Cast Iron: These are the tanks of the sump pump world. Cast iron is excellent at pulling heat away from the motor, which helps it run cooler and significantly extends its lifespan. A cast iron pump is a long-term investment in pure, rugged reliability.
- Thermoplastic: These are tough, corrosion-proof plastic pumps. They're lighter on the wallet than cast iron models and offer solid performance for many homes. While they are a good budget-friendly choice, they don't have the same durability as a cast iron unit.
A well-built cast iron pump might have a higher upfront cost, but its longevity often makes it the better value over the years. It’s the difference between buying a tool you’ll trust for a decade and one you might be replacing in a few years.
Understanding Horsepower and Performance
Sump pump motors are rated in horsepower (HP), typically ranging from 1/4 HP to 1 HP. Getting this right is critical. If the pump is too weak, it won't keep up during a heavy downpour. If it's too powerful, it will constantly switch on and off—a process called short-cycling—which will burn out the motor prematurely.
For most homes in the Toronto area, a 1/3 HP or 1/2 HP pump hits the sweet spot. A 1/3 HP model is usually sufficient for homes in areas with an average water table. However, if you're in a low-lying area or have had serious water problems in the past, stepping up to a 1/2 HP model buys you valuable peace of mind.
A professional can assess your situation and recommend the right horsepower to keep you protected without running up your hydro bill. If you're wondering what other benefits a properly installed system offers, you can read our guide on the advantages of having a sump pump installed in your home.
The Critical Role of the Switch
If the motor is the heart of the pump, the switch is its brain. It's the component that tells the pump when to turn on and shut off. A failing switch is one of the most common reasons a sump pump fails.
- Vertical Float Switch: These are widely considered the most reliable option for most sump pits. Their up-and-down motion makes them far less likely to get snagged on the side of the pit.
- Tethered Float Switch: This type floats at the end of a short cord, swinging up as the water rises. They work well, but they need a wider pit to ensure they don't get hung up on the pump or the walls of the pit.
When you're choosing a pump, pay attention to the quality of the switch. It’s a small detail that makes a huge difference when that pump needs to work flawlessly.
The Professional Installation Process: A Step-by-Step Breakdown
Ever wondered what goes into a professional sump pump installation? It’s much more than just digging a hole in your basement. Seeing the process unfold helps you understand what you’re paying for and spot the difference between a rushed job and quality craftsmanship.
Let's walk through how a seasoned pro gets it done, from planning to the final test. Each step is crucial for a reliable system that will keep your basement dry.
Step 1: Site Assessment and Pit Location
Before any tools come out, an experienced plumber will survey your basement. Their goal is to find the absolute lowest point on your floor. That’s where water will naturally collect, making it the perfect spot for the sump pit. This isn't a guessing game.
They'll also map out the best route for the discharge pipe to get water safely away from your house and pinpoint a dedicated power source. This initial planning sets the stage for a system that works efficiently and meets all local building codes.
Step 2: Excavation and Concrete Work
Here's where things get a bit dusty. Using a jackhammer, the crew carefully breaks through the concrete floor to create an opening for the sump pit liner. This takes a steady hand to make a clean cut without damaging the surrounding foundation.
This infographic shows just how hands-on this stage is, as a professional breaks through the concrete to prepare the pit.
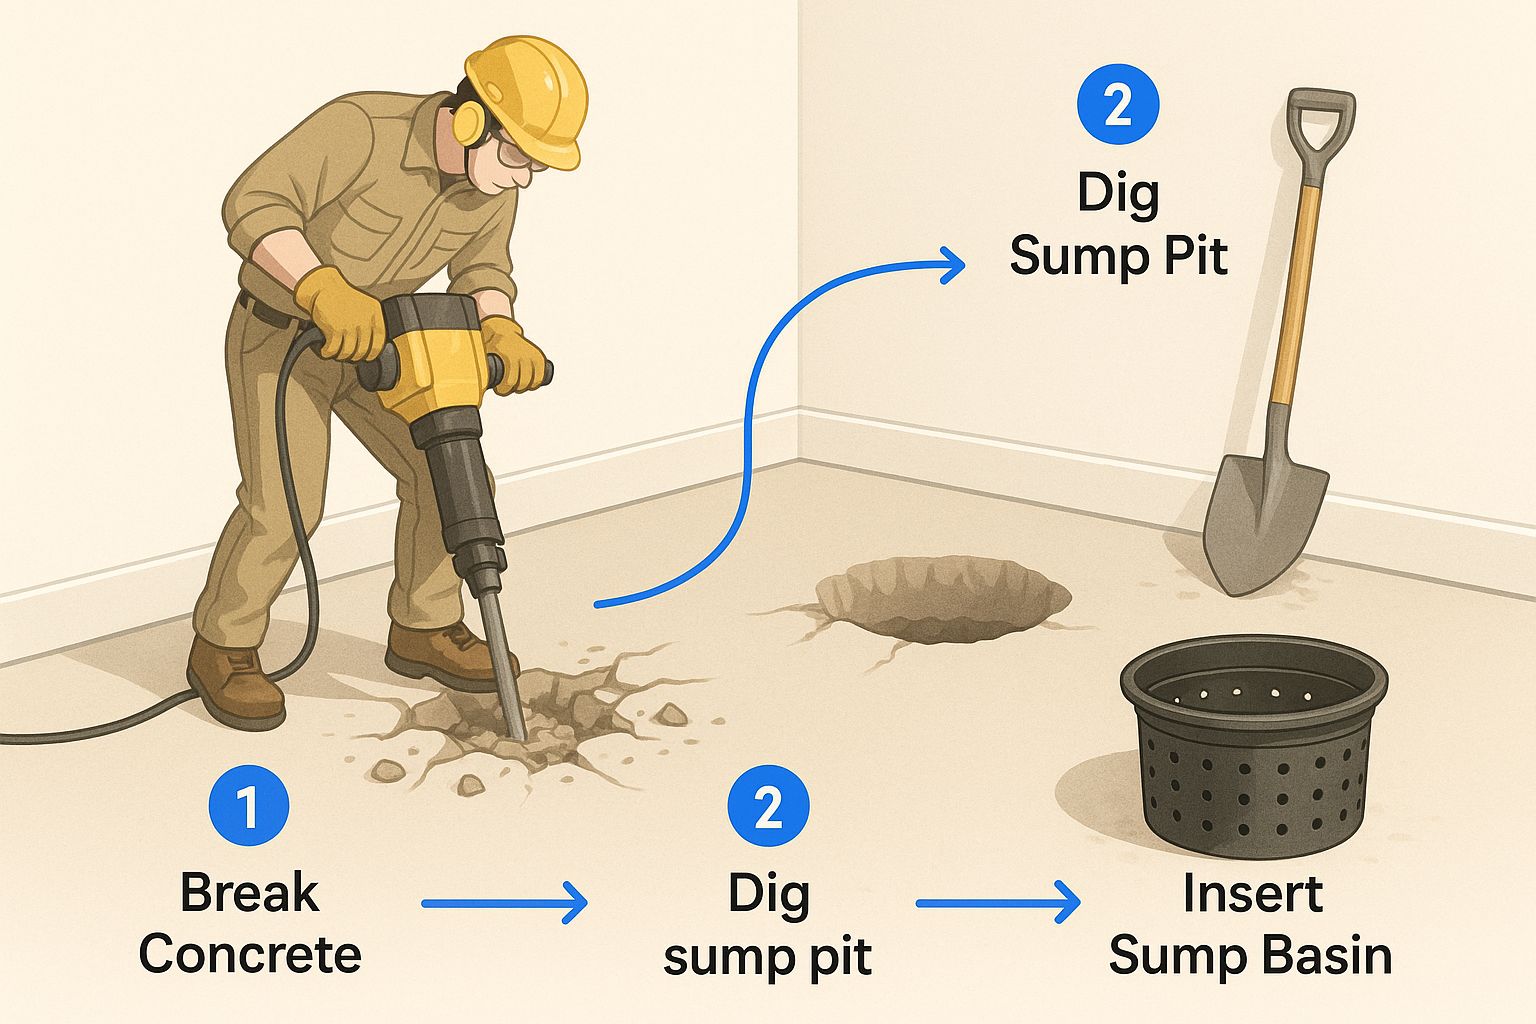
As you can see, this is labour-intensive work that requires both power and precision.
With the concrete removed, the team digs a hole large enough for the sump liner and a surrounding layer of gravel. This gravel acts as a filter, keeping mud and silt out of your pump while allowing water to flow freely into the pit.
Step 3: Setting the Pump and Plumbing
Once the pit is prepped, it's time to install the heart of the system. This involves a sequence of precise, critical connections.
- Place the Liner and Pump: The sump liner is set into the pit, the pump is positioned at the bottom, and gravel is filled in around the liner to lock it in place.
- Drill a Weep Hole: A tiny detail with a huge impact. A small 3/16-inch weep hole is drilled in the discharge pipe, just below the check valve. This prevents "air lock," a situation where trapped air stops the pump from moving water. It's a classic pro move that amateurs often miss.
- Install the Check Valve: This one-way valve is non-negotiable. It’s installed on the discharge pipe to prevent water from flowing back into the pit after the pump shuts off. Without it, the pump would cycle on and off constantly, leading to premature burnout.
- Connect Discharge Piping: Finally, PVC pipe is connected to the pump and run outside. It’s carefully sloped to use gravity, ensuring water is carried far away from your foundation.
To finish this stage, new concrete is mixed and poured around the sump liner, creating a smooth, professional finish that blends into your basement floor.
It’s the small details, like a properly installed check valve and a weep hole, that separate a professional job from a DIY attempt. These are essential for the pump's long-term health and reliability.
Step 4: Final Connections and System Testing
The job isn't finished until it’s proven to work. The plumber will plug the pump into a dedicated, GFCI-protected outlet—a crucial safety standard for any electrical device used near water.
Then comes the moment of truth. They’ll pour several buckets of water into the pit to simulate rising groundwater. They watch to make sure the float switch activates the pump at the right level and that the water is evacuated quickly. Once the water level drops, they ensure the pump shuts off and the check valve holds firm. This final test is your peace of mind, confirming your home is protected.
DIY Installation vs. Hiring a Professional
When it's time to install a new sump pump, the appeal of a weekend DIY project is understandable. You look at the labour costs and think, "I can save a bundle doing this myself." But this isn't like painting a bedroom. A sump pump is your basement's last line of defence against flooding, and a small mistake can lead to catastrophic failure.
We've seen the aftermath of well-intentioned DIY jobs gone wrong, and it’s never pretty. So, let's break down the real-world differences between tackling this yourself and calling in a professional. This decision goes far beyond the initial cost—it’s about protecting your home for the long haul.
The Appeal and Risks of a DIY Installation
The number one reason people consider a DIY installation is to save money. You can potentially sidestep $500 to $1,500+ in labour costs, which sounds great on paper. If you have serious experience with plumbing, breaking concrete, and electrical work, you might be successful.
However, the margin for error is razor-thin, and the consequences are severe. A successful sump pump installation is a science, demanding a real understanding of water flow, drainage, and safety protocols that you can't get from a five-minute video.
Here are the most common—and costly—mistakes we see:
- Improper Pit Placement: Digging the pit in the wrong spot is a classic error. If it's not at the lowest point where water collects, it won't do its job, leaving other parts of your basement vulnerable.
- Incorrect Pipe Slope: The discharge pipe needs a precise, continuous downward slope. Get it wrong, and water will pool in the line, potentially freezing and cracking in the winter or flowing right back toward your foundation.
- Serious Electrical Hazards: This is a big one. A sump pump operates in a wet environment and must be connected to a dedicated GFCI outlet. Messing up the wiring isn't just a code violation; it’s a genuine fire and electrocution risk.
- Voiding the Warranty: Many sump pump manufacturers will void their warranty if the unit isn’t installed by a licensed professional. If your new pump fails prematurely, you're footing the entire bill for a replacement.
The Value of Hiring a Professional
When you hire a reputable contractor, you're buying more than just a few hours of labour. You're investing in expertise, peace of mind, and the confidence that the job is done right the first time.
A professional installation is your insurance policy against future floods. It’s the confidence of knowing that when the worst of Toronto’s weather hits, your basement has a reliable line of defence, installed to the highest standards.
A qualified waterproofing expert brings several critical advantages:
- Expertise and Equipment: They know how to accurately assess your basement's specific drainage needs. Plus, they have professional-grade tools—like heavy-duty jackhammers and core drills—to get the job done efficiently without destroying your floor.
- Code Compliance: A professional is up-to-date on all local Toronto and Ontario building codes for plumbing and electrical work. This ensures your installation is not only effective but also safe and legal.
- Proper System Design: They’ll make sure every component, from the weep holes to the check valve, is perfectly installed for maximum performance and longevity.
- Warranty and Accountability: Professional work is almost always backed by a warranty. If anything goes wrong with the installation, they are on the hook to come back and fix it.
Understanding how home services businesses attract clients can also give you a feel for the standards and reputation that true professionals work hard to maintain.
Of course, installation is just the first step. For tips on keeping your system in top shape, you can find our expert advice on https://g1000home.ca/sump-pump-maintenance-repair-toronto/.
How to Maintain Your Sump Pump for Long-Term Protection
Installing a new sump pump isn't the final step—it's the first. While a professional installation sets you up for success, that pump is a piece of mechanical equipment. Like your car, it needs a little routine care to ensure it’s ready to work when the water starts rising.
Think of it this way: you have smoke detectors to warn you about fire, but you still test them. The same logic applies here. A few simple maintenance checks, done on a regular schedule, can be the difference between a dry basement and a catastrophic flood. This isn't complicated, but it is absolutely essential.
Your Quarterly Maintenance Checklist
Set a reminder to do this every three months. It’s especially smart to run through this list before the spring thaw and again before the heavy autumn rains we get around Toronto.
- Test the Pump: This is the most important check. Grab a bucket of water and pour it into the sump pit. You want to see the float switch lift and turn the pump on. Make sure it pumps the water out efficiently and then shuts off as it should.
- Clean the Pit: Before you do anything, unplug the pump. Look inside the pit for any silt, gravel, or debris that might have washed in. Scoop out anything that could get sucked into the pump and cause a jam.
- Inspect the Power Source: Check that the pump is still firmly plugged into its GFCI outlet. Push the "Test" and "Reset" buttons on the outlet to make sure it's working properly and protecting the pump from electrical surges.
Your Annual Sump Pump Inspection
Once a year, it pays to do a slightly deeper dive to spot potential problems before they become major headaches.
- Remove and Clean the Pump: Unplug the unit and disconnect it from the discharge pipe. Lift the pump out of the pit. Take a few minutes to clean any sludge off the pump screen and impeller.
- Check the Check Valve: This one-way valve is critical—it stops water from flowing back into your pit after the pump shuts off. Confirm it's installed correctly and the flap inside moves freely.
- Clear the Discharge Pipe: Head outside and find where the pipe lets water out. Make sure it’s clear of leaves, dirt, ice, or even animal nests that could create a blockage and force water back toward your foundation.
Regular maintenance is the single most effective way to maximize your pump’s lifespan. A well-cared-for unit can provide reliable protection for a decade or more, while a neglected pump might fail in just a few years.
Following these simple steps keeps your sump pump system in prime condition, ready for whatever the weather throws at it. If you want to get a better handle on how long your equipment should last with proper care, you can learn more about what is the expected lifespan of a sump pump from our expert guide.
Your Sump Pump Questions, Answered
Over the years, we've heard just about every question there is about sump pumps. Here are the answers to a few of the most common ones we hear from homeowners across Toronto.
How Long Can I Expect My Sump Pump to Last?
A well-made sump pump, installed correctly, should give you a solid 7 to 10 years of service. Of course, that number can shift based on how hard it has to work, the quality of the unit, and if you’ve kept up with maintenance.
It’s also worth noting that cast iron pumps almost always have a longer life than their plastic cousins. Our best advice? Test your pump every few months, especially before a big storm is forecast. Once you start getting close to that 10-year mark, it’s wise to think about a replacement before you’re forced into one during a downpour.
Is a Battery Backup Really Necessary?
In the GTA? Absolutely. A battery backup isn't just a nice-to-have feature; it's your first line of defence. The powerful storms that can flood your basement are the exact same ones most likely to knock out your power.
Without a battery backup, a power outage turns your sump pump into a useless piece of equipment at the worst possible moment. It’s a small price to pay for the peace of mind that comes with knowing your basement is protected, no matter what the weather throws at you.
Will My Home Insurance Cover a New Sump Pump?
Typically, no. Most insurance policies see installing a sump pump as a proactive, preventative measure, not a repair for damage that’s already happened. It’s considered an upgrade to make your home more resilient.
But here’s the upside: having a sump pump can actually save you money. Many insurance companies offer discounts on your premium if you have one installed, especially if it includes a battery backup system. It lowers their risk, so they pass some of that savings on to you. It's always a good idea to call your provider and ask—you might be pleasantly surprised.
Your home’s foundation is its most critical asset, and keeping it dry is one of the smartest investments you can make. If you have any more questions about protecting your basement or want a professional to take a look, the team at G1000 Home Substructure is ready to help. Contact us today for a free, no-obligation consultation.

